
Icom Ethernet Setup
Starting in version 1.574 Win4IcomSuite supports direct Ethernet connectivity with the Win4AddOnPac addition.
Prerequisites
- A licensed copy of Win4Icom version 1.574 or later.
- The Win4AddOnPac Download and Purchase
- IC-7610, IC-7300MK2, IC-9700, IC-7760, IC-705 all with the latest firmware as of July 2026. It is recommended to use a wired connection if possible.
Setup
- Step 1: Make sure you have downloaded the latest Win4AddOnPac, version 1.06 or later as well as the latest Win4IcomSuite, version 1.574 or later. Run at least one of the addons to initialize it.
- Step 2: Open the menu for the radio and click on Set, Network. On the first page , you should setup your IP Address parameters. It is recommended to use a static IP address.
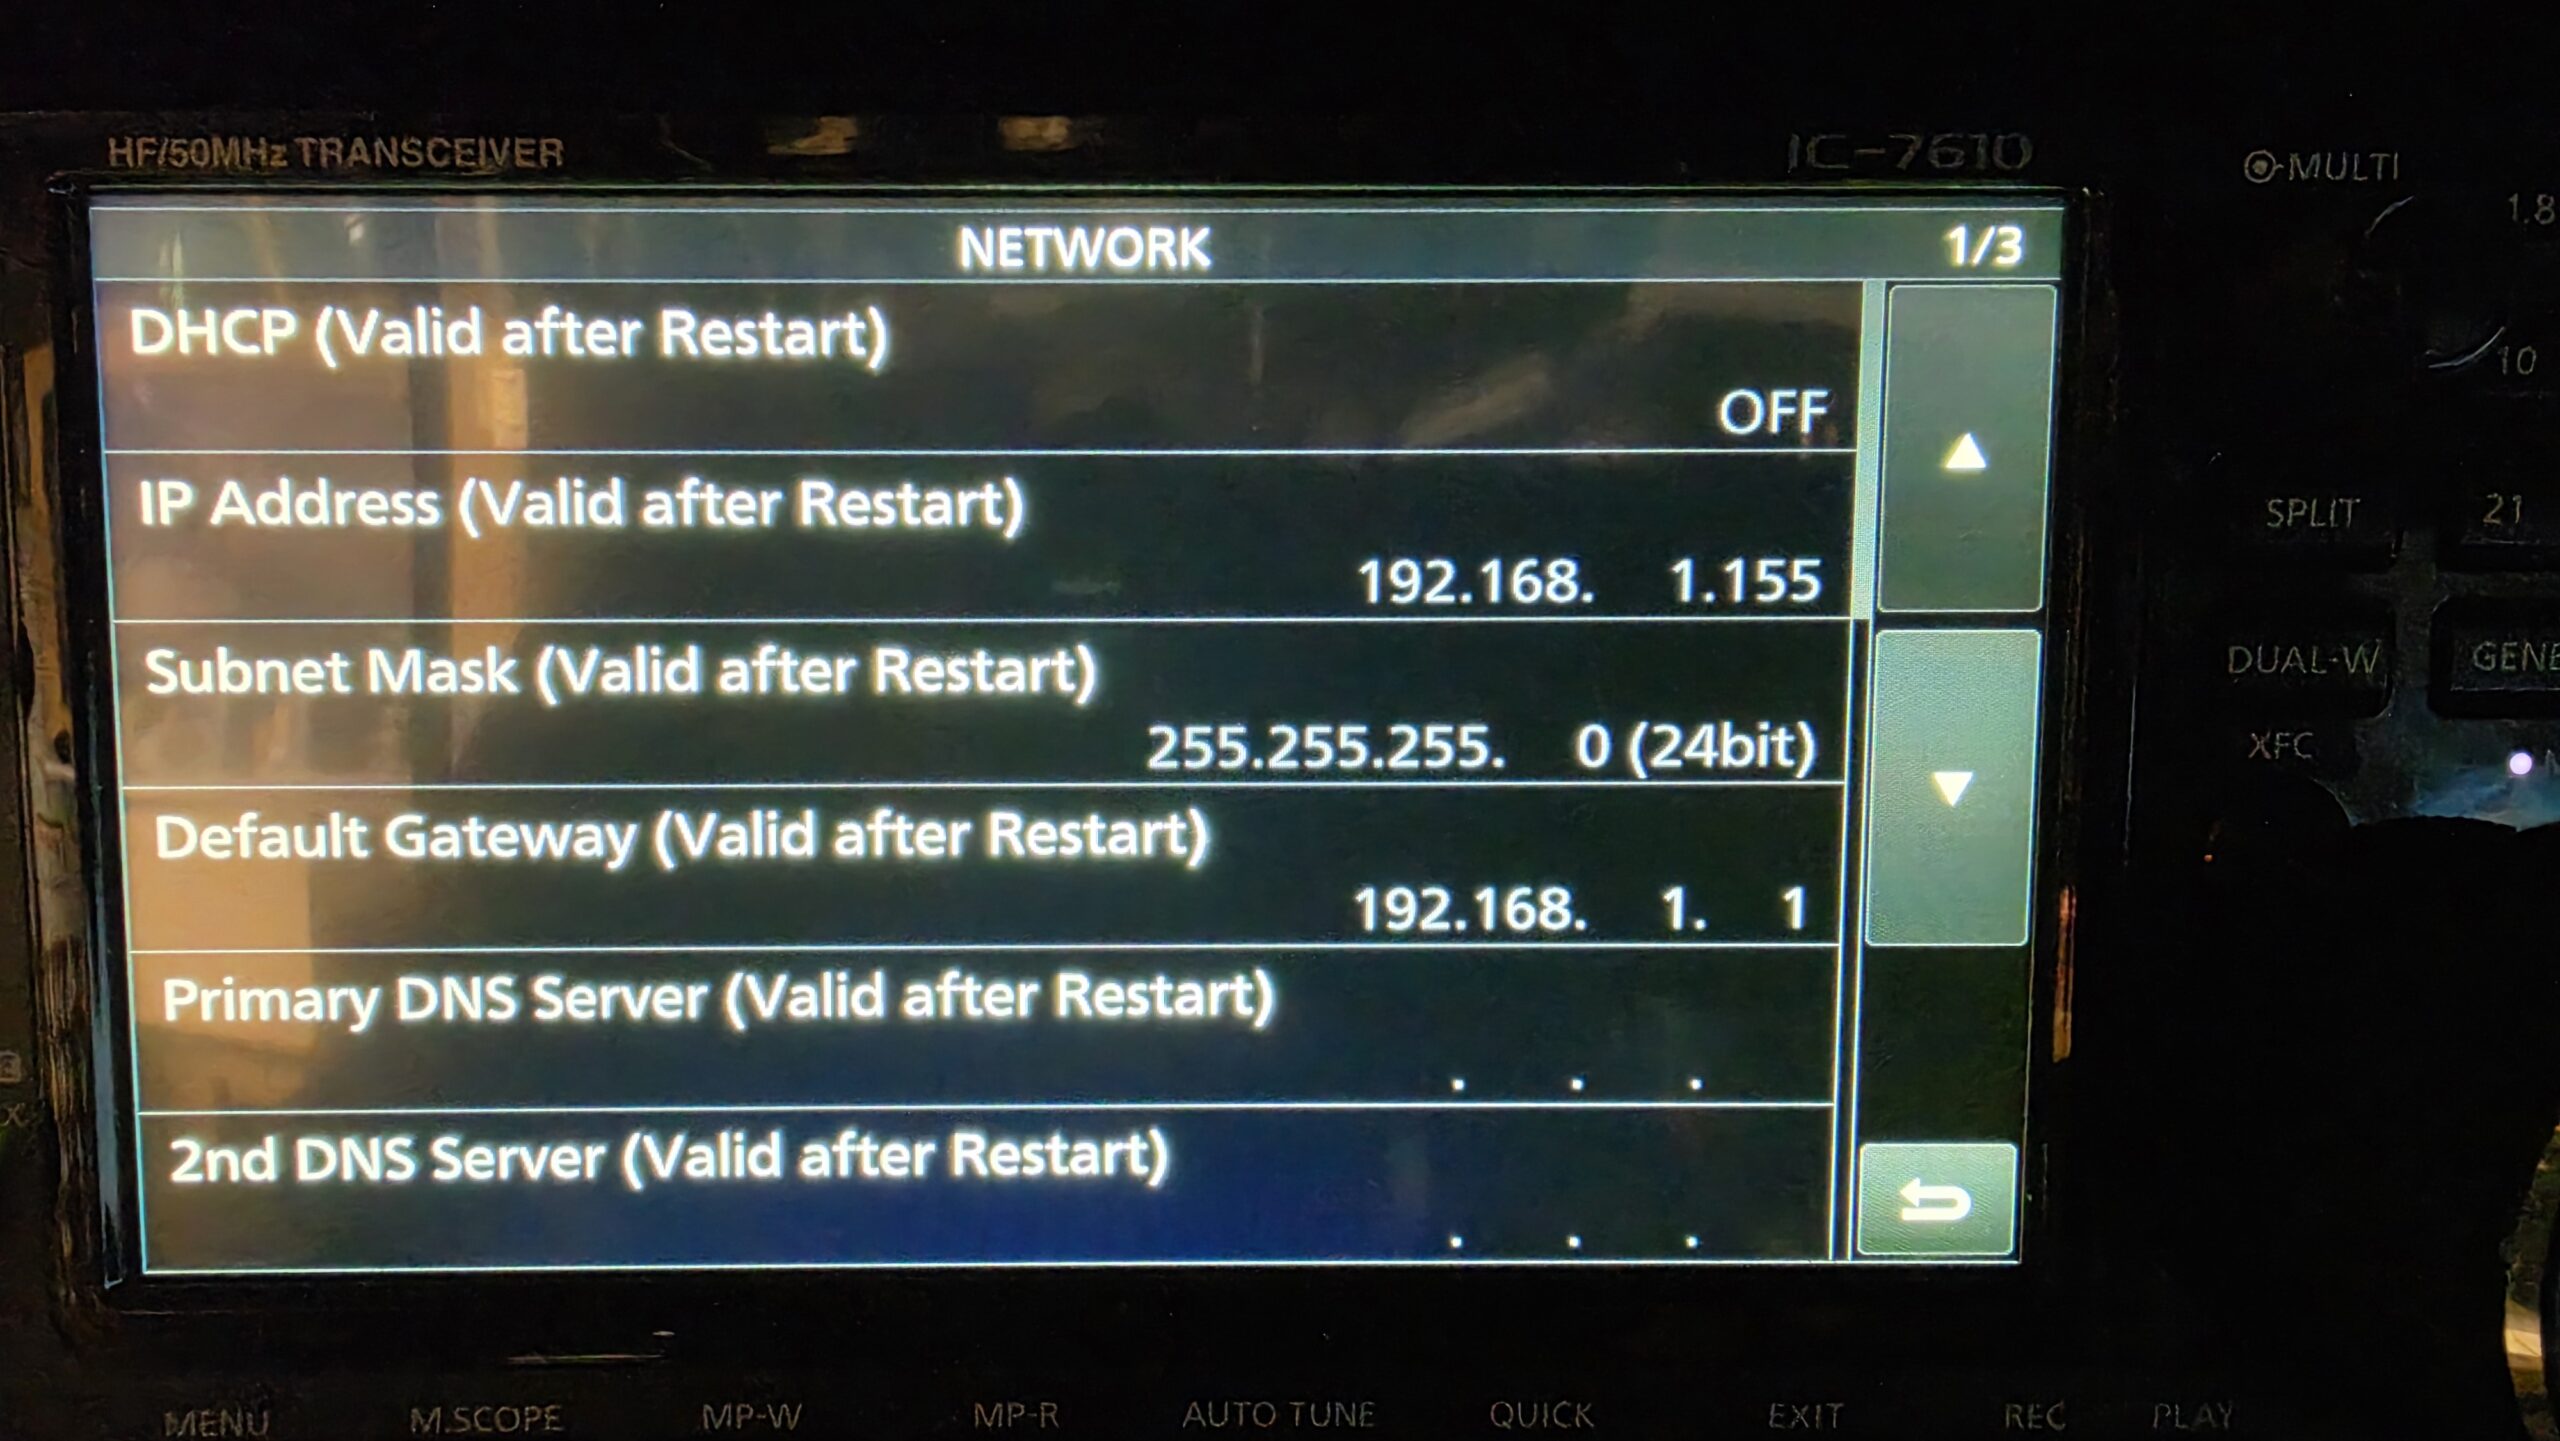
- Step 3: On a subsequent page you should set the Network Control to ON, and Power OFF setting (for remote control) to Standby/Shutdown. The ports section by default are set to 50001, 50002, and 50003. If you use AnyDesk it is recommended to change this to 50004, 50005, 50006 to avoid a conflict.
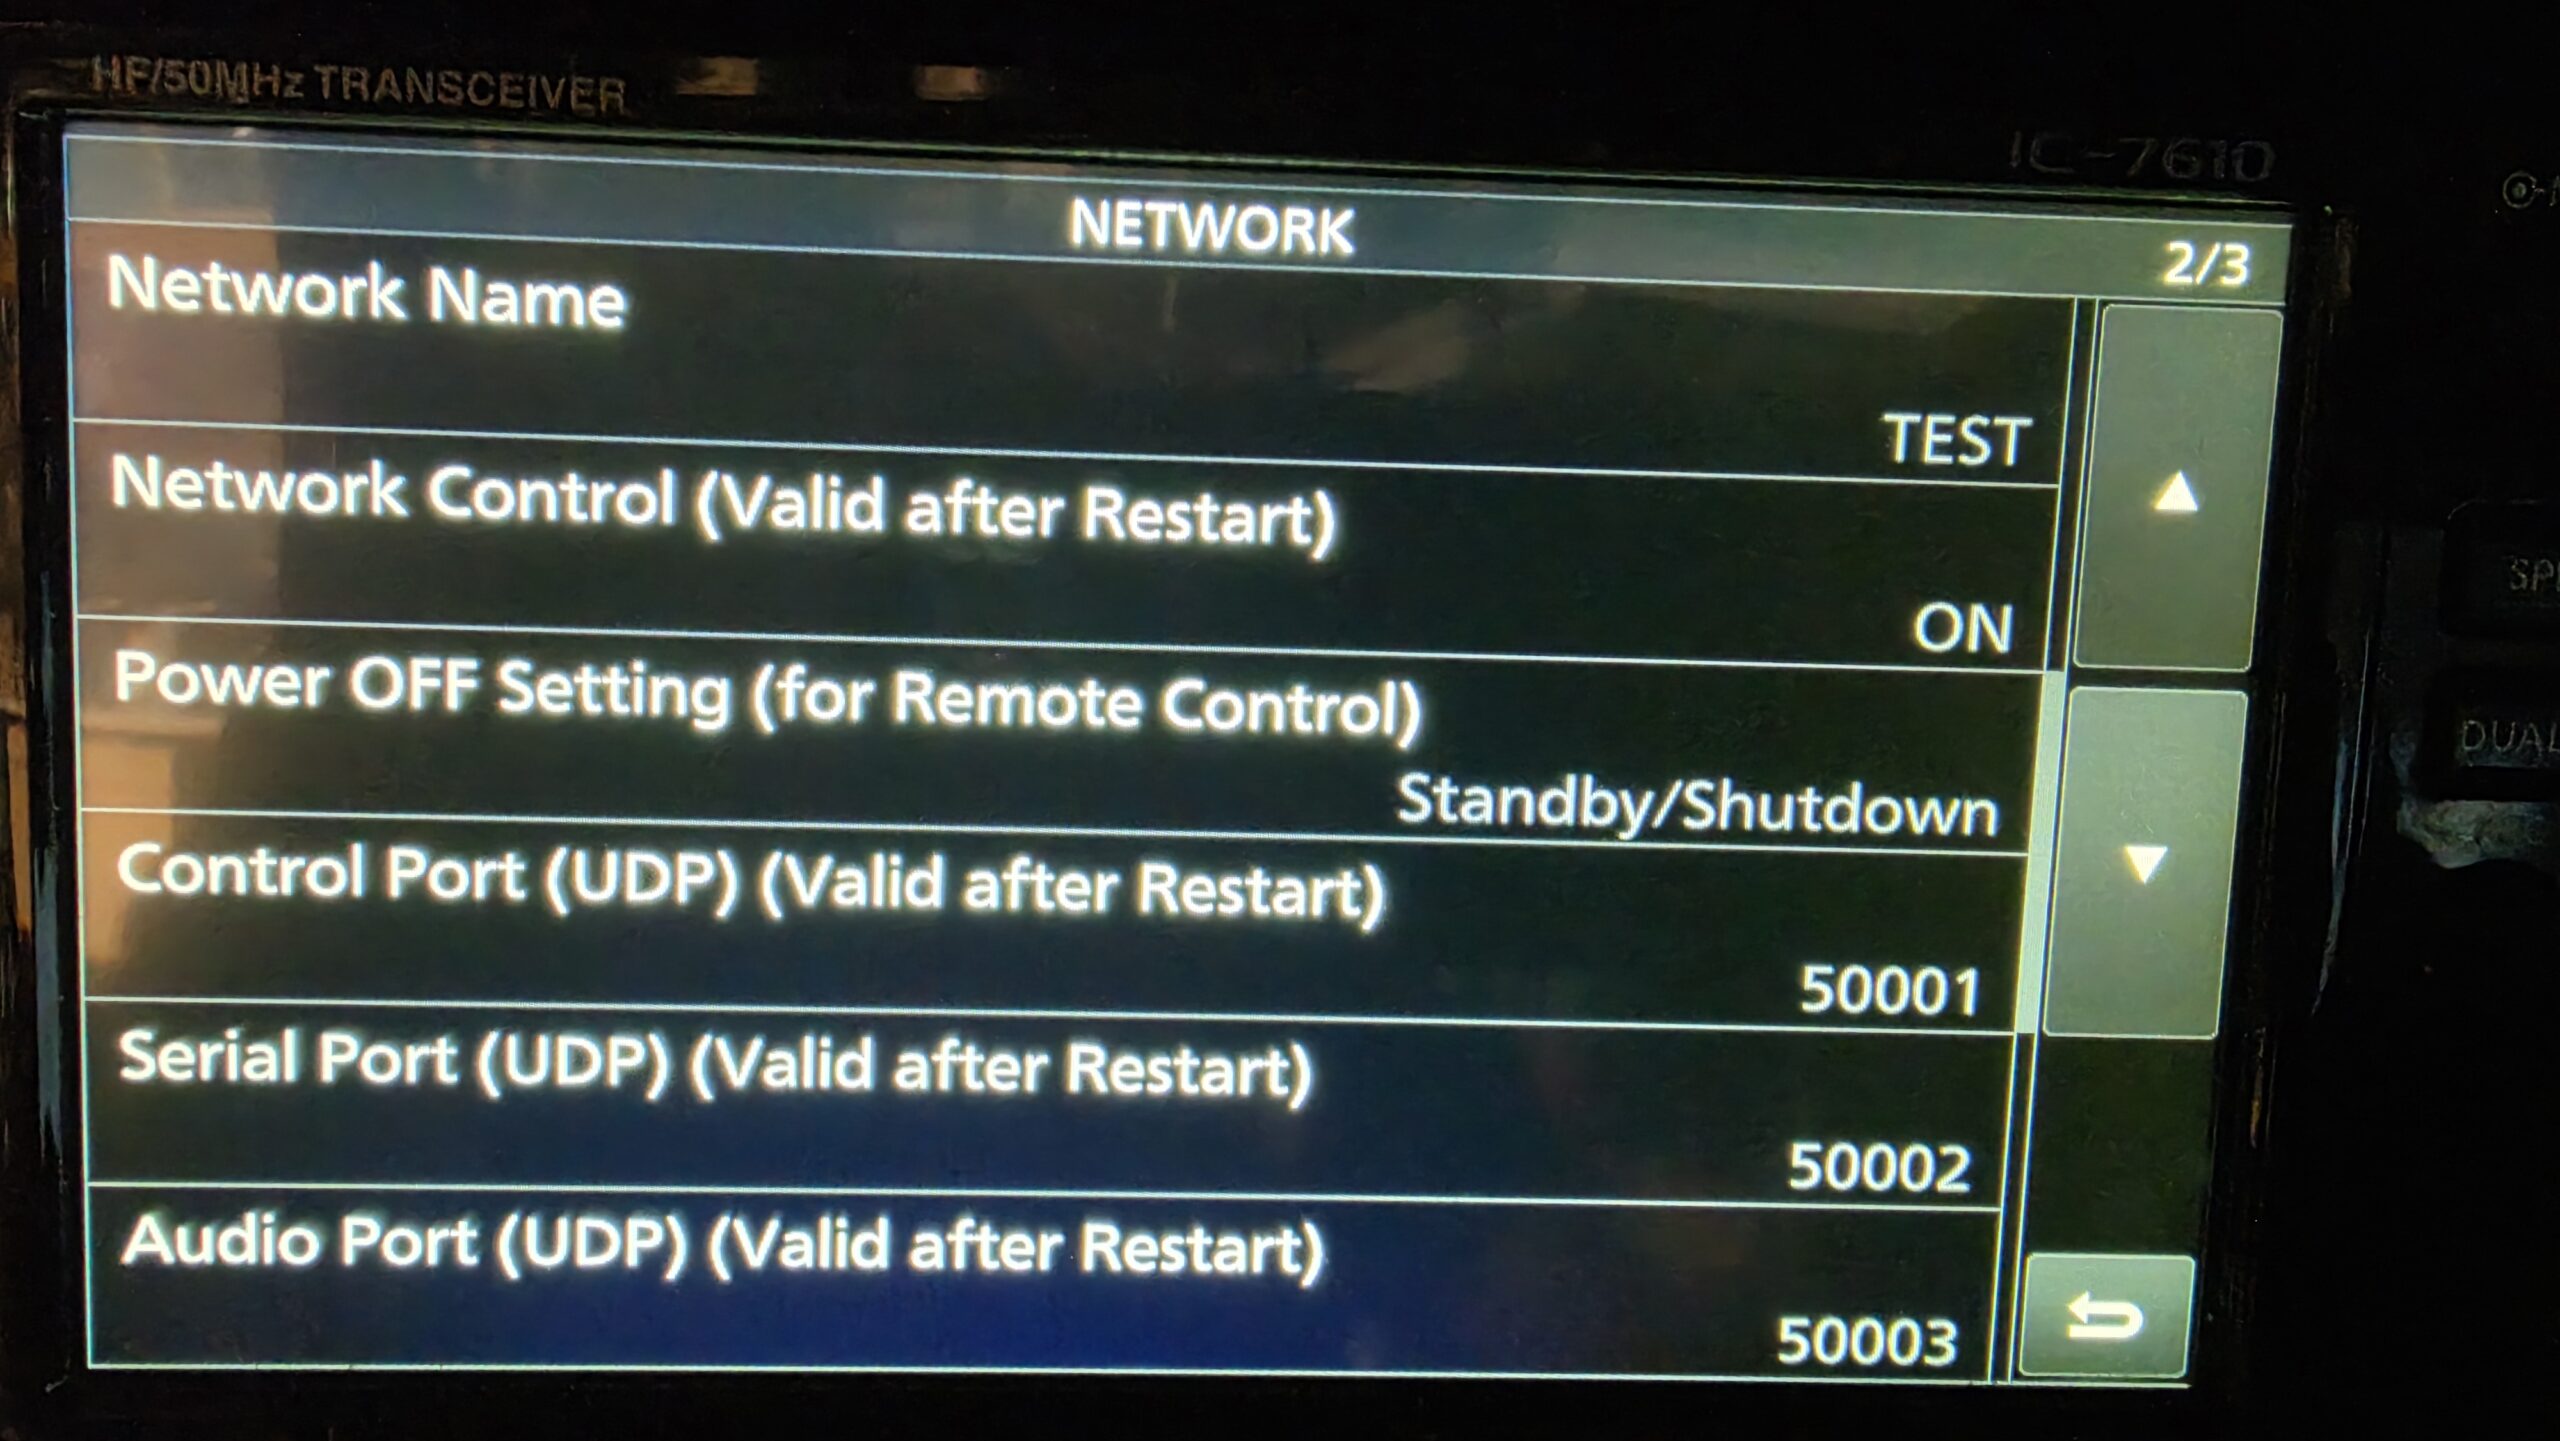
- Step 4: On the next page you can set a user name and password.
- Step 5: Make note of the above parameters and exit from the menu. Turn off the radio and restart it.
- Step 6: Open Win4IcomSuite. If you are already using the USB connection or the client server utility, go into Tools, Settings and then disconnect from the radio. Restart the software.
- Step 7: On starting Win4Icom you will be presented with the following page:
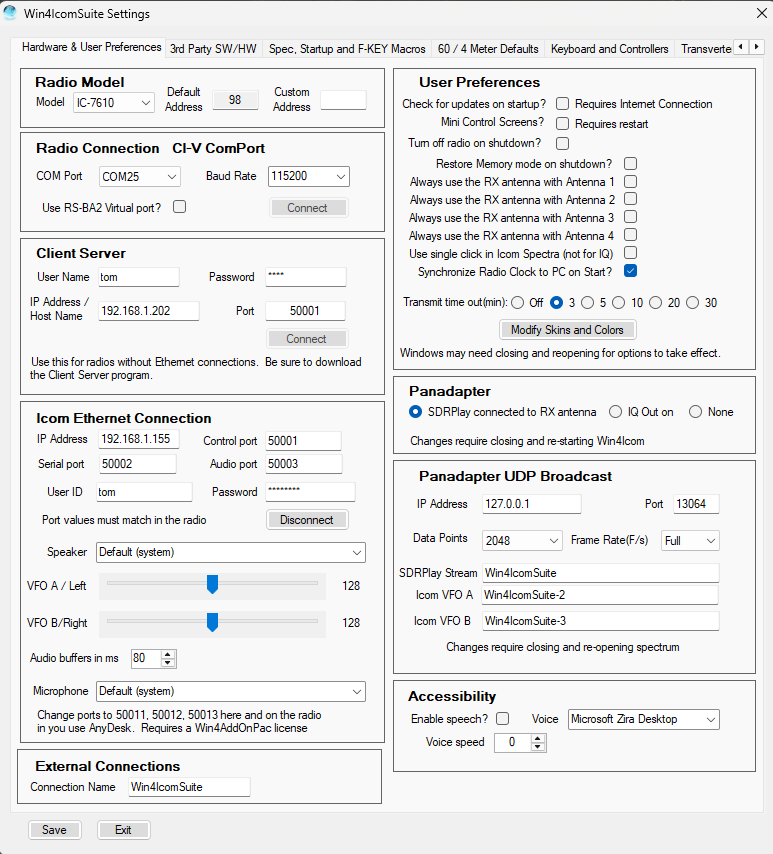
The section of interest is the Icom Ethernet Connection. In here, you will need to enter your IP Address, the three ports, your user ID and password. You can also enter your speaker and microphone devices. If you plan on using WSJT or any other application that needs sound, you will need to use a Virtual Audio cable such as the HiFi version listed about 3/4 of the page down here. For further information on this, please look in the Win4Icom manual under the client server section. The Audio buffers setting is the amount of audio to buffer. For Lan connections the default of 80 is acceptable. This will introduce a small latency of 80ms on the audio. For remote use over the internet you will need to increase this to a higher value. 240ms is good for good connections but if you have a bad connection this might need to be higher.
- Step 8: Click Connect. If everything is correct, the button will change to “Disconnect”. You can then click the Save button to exit to the control screen. If the connection is not successful, then check your settings, and wait at least 10 seconds before trying again.