Win4Logbook Database
1. Introduction
VA2FSQ Log is a desktop logging application for amateur radio operators. It stores contact (QSO) records in a local SQLite database and provides searching, editing, QRZ.com lookups, eQSL and LoTW functionality and ADIF import/export.
2. Getting Started
- The first time you run the application it will present you with the following window:
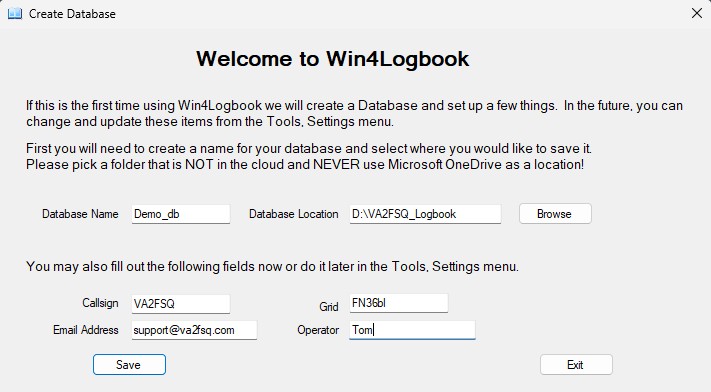
You must pick a database name and location on your PC or LAN and fill out the additional fields. The database name and location are mandatory at this point but the other can be filled later in Tools, Settings.
3. Main Window
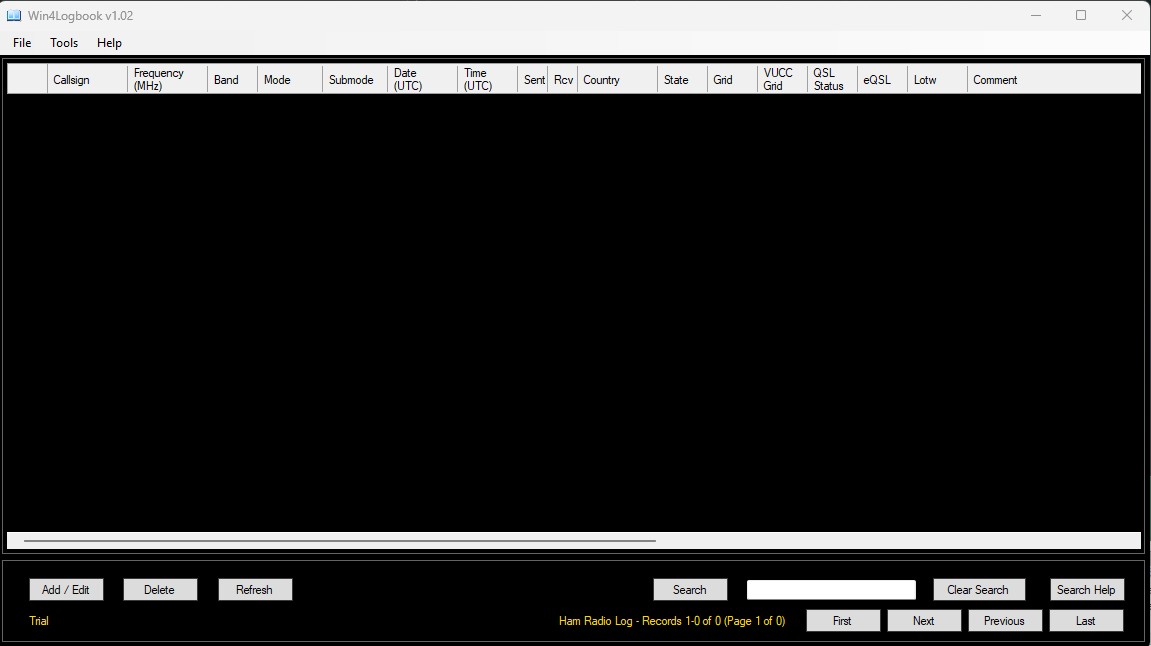
The main window shows a grid of logged contacts at the top and some navigation, search and basic database functions.
The fields in the database are Callsign, Frequency, Band, Mode, Date, Time, Sent/Received reports, Country, State, Grid, VUCC Grid, QSL Status, eQSL, LoTW and Comments. In addition, but not shown, are 8 user-definable columns:
4. Next Steps
Many users will want to start right away with loading an existing database. That database will have to be exported to an ADIF file and then imported into Win4Logbook. This feature is located in the Tools ADIF / eQSL / LoTW / Clublog menu. When you select this you will get: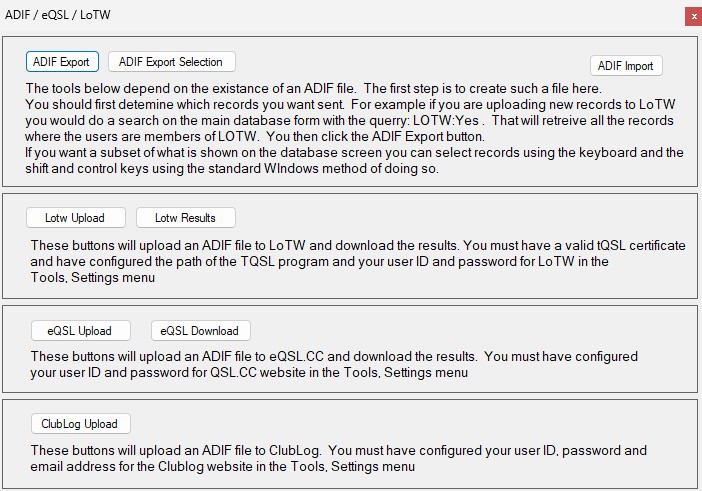
The button of importance is the ADIF Import button. When pressed it will ask for an existing ADIF file. Select that and your database will be filled with the records from your previous database. 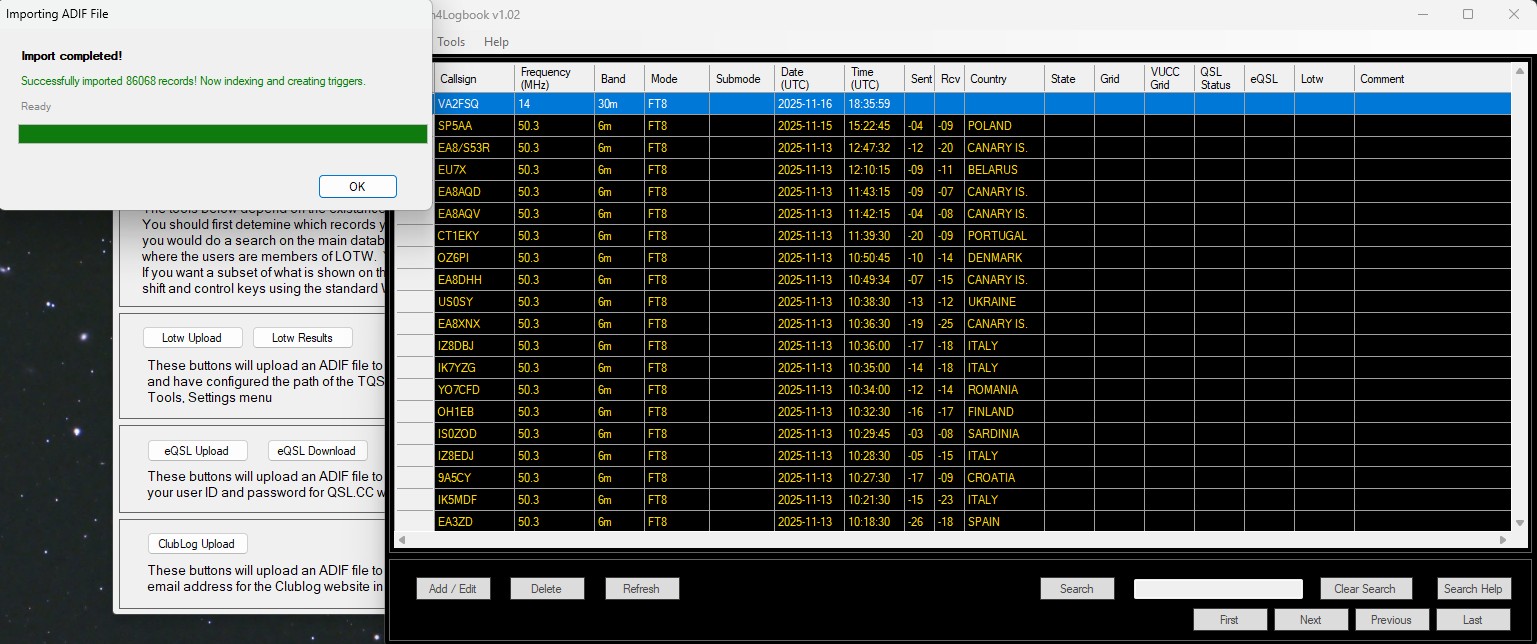
The import will take about 5 seconds for a 100,000 records. 20 seconds for a million. This is of course CPU dependent.
- Adding or Editing a record
- To Add or edit a record, press the Add/Edit button. You will be presented with a screen that shows all of the data from the highlighted row in the database.
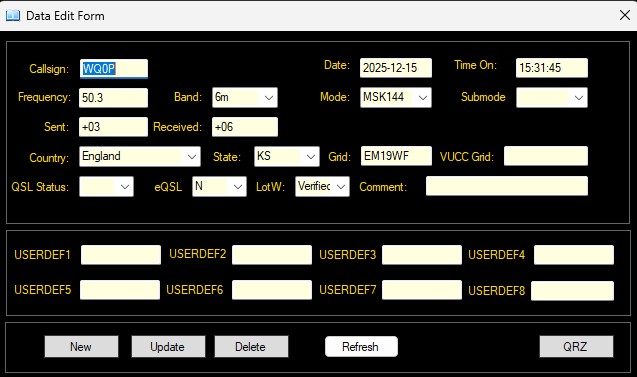
At this point, you can proceed to edit the record by just changing what ever fields you wish and then click Update. If you wish to Add a New record, then press the New button.
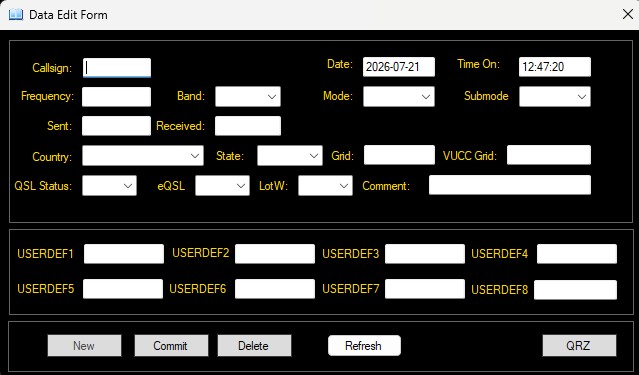
There are fields that are mandatory. These include the Callsign, Frequency (Mhz), and Mode. You can at this point continue to enter more details. You can also click on the QRZ button (subscription required) to get many additional data points such as country, state, name and so on.
A few comments on this process: To get the most out of Win4Logbook there are several settings that need to be filled. These include settings pertaining to eQSL, LOTW, QRZ and others. These will be explained in the following section.
5. Settings
In order to get the most out of Win4Logbook, you will need to fill out the Tools, Settings / Utilities menu:
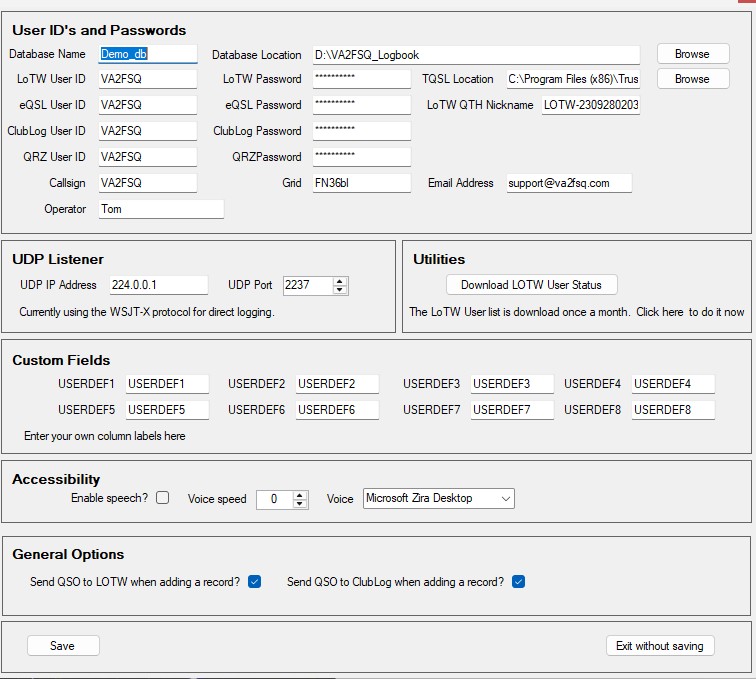
There are several sections here, the most important of which is the User ID’s and Passwords section. You will need to fill out the fields for user id’s and passwords for each of the services you subscribe to.
This form also allows you to change the database which if you do so, you will need to restart Win4Logbook.
Utilities: There is one panel called Utilities and in there is a button to check the ARRL LoTW database for people that subscribe to LoTW. This is done automatically once a month but you can do this on demand by checking this button. This only checks if the Callsign is associated with a LoTW account. It does not upload records to LoTW. That is in the Tools, ADIF / eQSL / LoTW menu.
6. Searching the Database
Win4Logbook uses the free text search engine FTS5. This allows quick and easy searches without using a SQL statement or filling forms.
To search ALL data for a string just enter it into the search box and press the Search button. For example, entering VA2FSQ will retrieve all records that contain VA2FSQ.
If you want to be specific, then you need to specify the column name (Upper case) followed by a colon like this:
LOTW: yes
This will search all of the LOTW column for the yes word. This is useful for creating a ADIF file to upload to LoTW.
Here is a list of all the column names: (Case is important)
CALLSIGN
FREQUENCY
BAND
MODE
SUBMODE
QSO_DATE
QSO_TIME
SENT
RECEIVED
COUNTRY
STATE
GRID
VUCC_GRIDS
QSL_STATUS
EQSL
LOTW
COMMENT
If you wish to search on more than one field you can use the AND and OR operator as follows:
COUNTRY: “United States” AND LOTW: Verified
Note the use of quotes for data that has spaces in them.
7. Tools Menu
Selecting Tools, ADIF / eQSL / LoTW / Clublog will open this menu:
There are several options here.
- ADIF Export and ADIF Export Selection
- This option allows you to export your records to an ADIF file. The ADIF Export will export all of your records. If you have a selection of records as the result of a search for example, you will need to highlight all of them by clicking in the left column and using the shift key to extend the selection or the control key to exclude records from the selection. For example I searched on Sent in the database and then I selected all of the found records except for two as shown here:
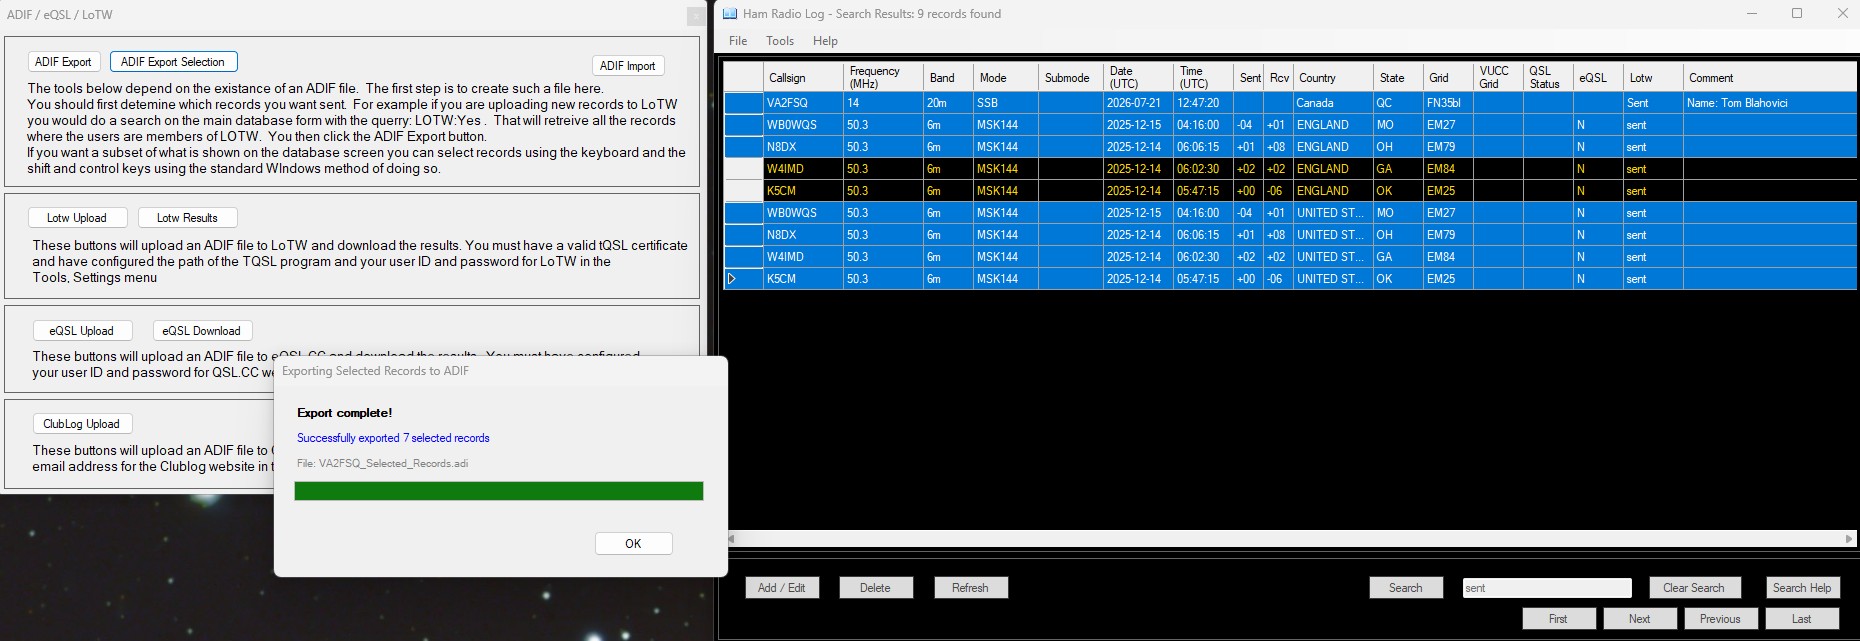
- This option allows you to export your records to an ADIF file. The ADIF Export will export all of your records. If you have a selection of records as the result of a search for example, you will need to highlight all of them by clicking in the left column and using the shift key to extend the selection or the control key to exclude records from the selection. For example I searched on Sent in the database and then I selected all of the found records except for two as shown here:
- LoTW Upload and LoTW Results.
- The upload will send all of the records that have not been sent to LoTW. It will ask for a filename which will be the ADIF file you exported in the ADIF export.
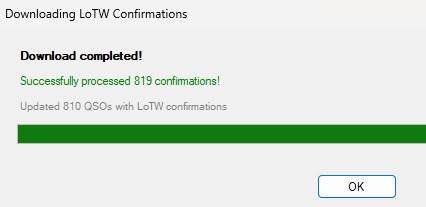
- The Results button will go to LoTW and retrieve the results based on the records you sent. There can be a significant delay doing this once you send your records so at contest times it can be days…
-
- eQSL Upload and eQSL Download
- This operates exactly the same as the LoTW section.
- ClubLog Upload
- This operates exactly the same as the uploads for LoTW and eQSL.
8. Awards Menu
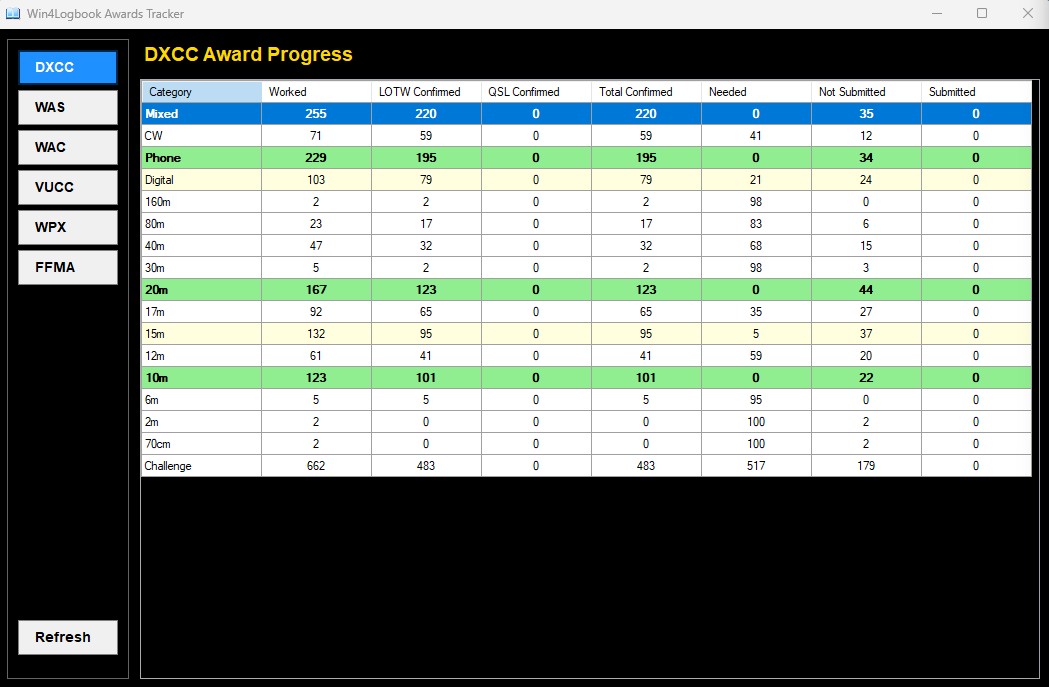
A number of awards based on your QSO’s are available and more will be added in the future.